Set Up Atlas Connectivity
Author: MongoDB Documentation Team
This guide will show you how to set up your Atlas cluster for connections from a client. You will:
- whitelist your IP address in order to allow access to your Atlas cluster
- locate your connection string and copy it
Time required: 15 minutes
What You’ll Need
- A MongoDB account. See Create and Manage a MongoDB Account.
- An Atlas cluster. See Create a New Cluster
- A MongoDB user. See Configure MongoDB Users in the Atlas documentation.
Procedure
Login to Atlas
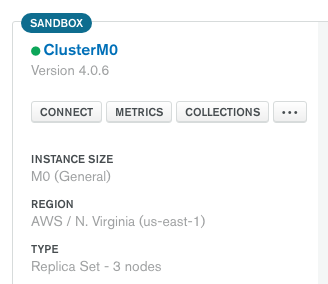
Click the Connect button
Click the connect button on the cluster management panel. The following Atlas screenshot shows the connect button:
Whitelist your IP address and select your connection method
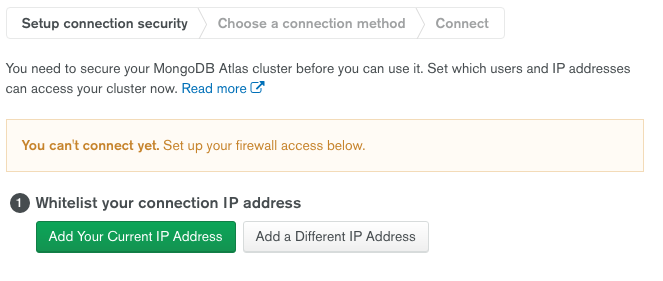
In the Setup connection security step in the modal window, check to make sure your IP address is in the whitelist for Atlas connections. If it is not, add it.
The following Atlas screenshot shows the options for adding IP addresses in the Atlas UI:
If your cluster already has one or more IP Whitelist entries you will not have access to the button to add your IP address in the modal. Instead, use the following procedure to add your IP address to the whitelist:
- Exit the modal window.
- Click the Security tab in the Atlas UI.
- Click the IP Whitelist tab.
- Click the green Add IP Address button.
- Add your IP address.
- Return to the Clusters Overview tab.
- Click the Connect button and proceed.
For more information on whitelisting IP addresses, see Configure Whitelist Entries in the Atlas documentation.
Copy the connection string
- Mongo Shell
- Compass
- Python
- Java (Sync)
- Node.js
- Other
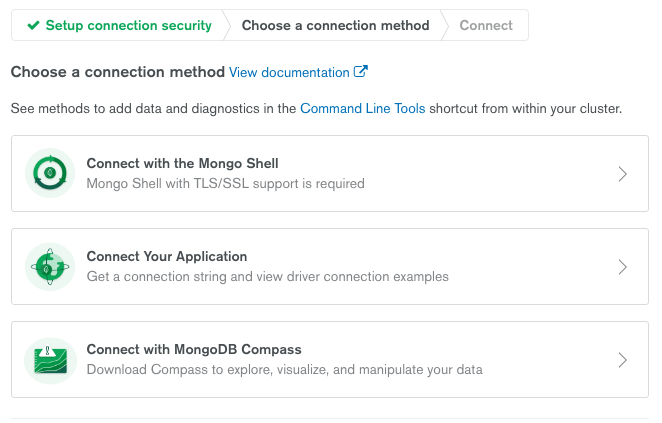
In the Choose a connection method step in the modal window, select the button marked Connect with the Mongo Shell.
The following Atlas screenshot shows the connection option buttons:
Follow the instructions for your platform.
In the Choose a connection method step in the modal window select the button marked Connect with MongoDB Compass.
The following Atlas screenshot shows the connection option buttons:
Follow the instructions for your version of Compass.
In the Choose your connection method step in the modal, select the button marked Connect Your Application.
The following Atlas screenshot shows the connection option buttons:
Follow the instructions for your driver language and version.
In the Choose your connection method step in the modal, select the button marked Connect Your Application.
The following Atlas screenshot shows the connection option buttons:
Follow the instructions for your driver language and version.
In the Choose your connection method step in the modal, select the button marked Connect Your Application.
The following Atlas screenshot shows the connection option buttons:
Follow the instructions for your driver language and version.
In the Choose your connection method step in the modal, select the button marked Connect Your Application.
The following Atlas screenshot shows the connection option buttons:
Follow the instructions for your driver language and version.
In the Choose your connection method step in the modal, select the button marked Connect Your Application.
The following Atlas screenshot shows the connection option buttons:
Follow the instructions for your driver language and version.
Summary
If you have successfully completed this guide, you will now have your IP address in the Atlas whitelist, and an Atlas connection string in your copy buffer.